Achieving the perfect plowing performance hinges on the precise alignment of your tractor’s top link and plow assembly. Whether you’re working a small garden plot or tackling acres of farmland, a correct angle ensures consistent furrow depth, minimizes draft force, and preserves soil structure. This guide walks you through essential steps—from initial safety checks to fine-tuning adjustments—so you can optimize your equipment and maximize field productivity.
Preparation and Safety Measures
Before making any adjustments, prioritize safety and proper setup. Park the tractor on a level surface and engage the parking brake. Lower the plow to the ground and shut off the engine. Place wheel chocks behind the tractor tires to prevent movement. Inspect the three-point hitch components for cracks, bent pins, or excessive wear. Clean off debris, mud, and rust with a wire brush to ensure that bolts and linkages move freely. Wearing gloves and protective eyewear adds an extra layer of safety as you handle heavy metal parts.
Setting Initial Plow Height and Tilt
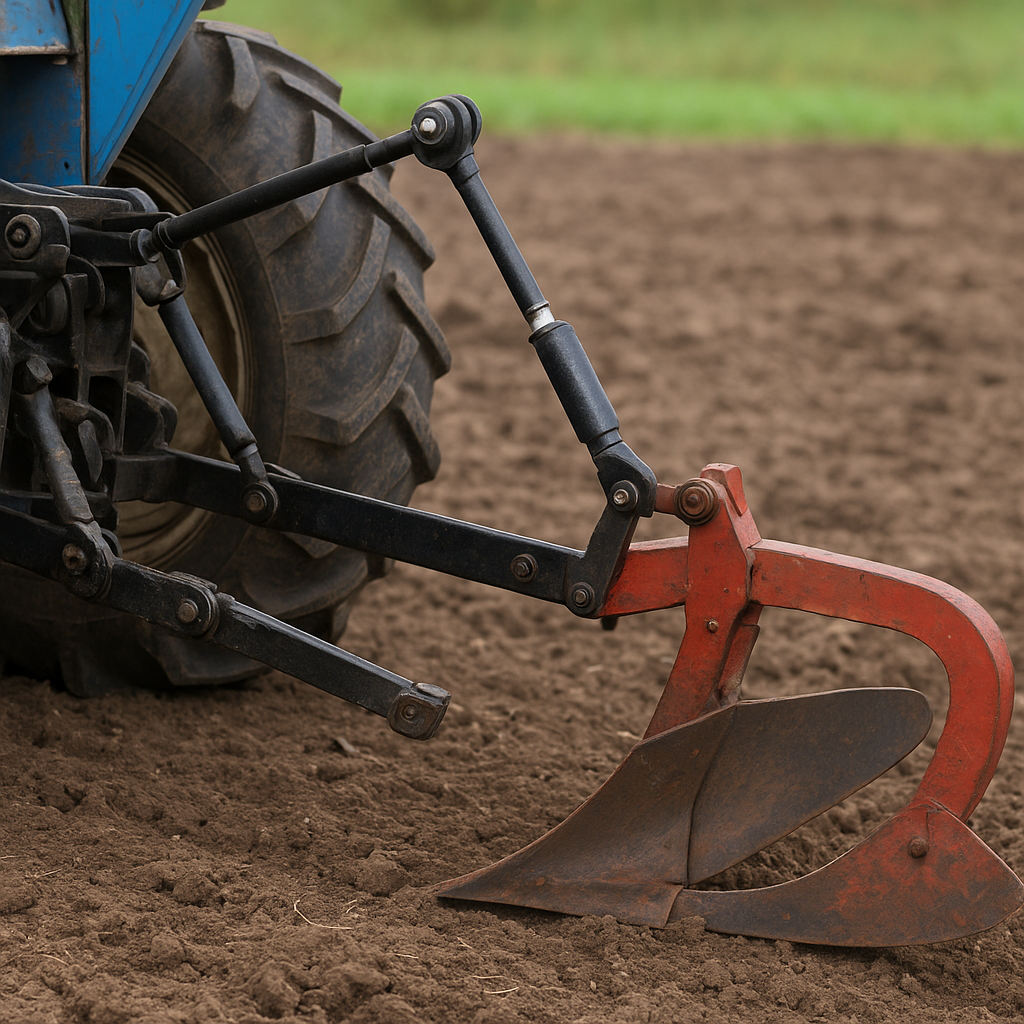
Accurate depth control begins with the right initial settings. Raise the plow until the share tip is just a few inches above the ground. Adjust the lower lift arms so the plow’s mainframe sits parallel to the tractor’s rear axle. This creates a neutral starting point. Next, extend or retract the top link to achieve a slight forward tilt—roughly 2 to 3 degrees—so the plow will cut into the soil rather than ride across the surface. If your plow includes an adjustable beam or reversible moldboard, set these elements to match the soil conditions and crop residue volume in the field.
Adjusting the Top Link for Optimal Plow Angle
Step-by-Step Procedure
- Disconnect the top link at the plow end, leaving the lower lift arms in place for stability.
- Manually rotate the top link adjuster until the plow’s main frame shows the desired forward lean when viewed from the side.
- Reattach the top link. Tighten the locknut to prevent unwanted shifts under load.
- Measure the actual moldboard angle using a digital inclinometer or angle finder. Aim for 75–85 degrees relative to the direction of travel.
- If the angle is too steep, slightly shorten the top link; if too shallow, lengthen it. Make incremental adjustments of no more than half a turn at a time.
- Drive the tractor forward a few feet and stop. Inspect the furrow for uniform width, straightness, and consistent soil turnover.
- Repeat the measurement and adjustment sequence until the plow produces clean, level furrows without side draft strain.
This iterative process aligns the plow’s hitch geometry with ground contours and tractor power distribution.
Troubleshooting Common Alignment Issues
Uneven Furrows or Skewed Plowing
If your furrows veer to one side, first check that your tractor’s rear wheels have equal tire pressure. Verify that the lower lift arms are set to identical heights on both sides. A misaligned draft link or bent top link can also cause lateral pull. Inspect these parts and replace any that show visible deformation.
Excessive Draft and Engine Strain
When the plow angle is too steep, draft force spikes, making the tractor lug under load. Soften the angle by lengthening the top link incrementally until the engine runs smoothly at recommended throttle settings. Monitor fuel consumption and RPM; a drop in fuel usage often signals a more efficient plowing angle.
Inconsistent Plow Depth
Uneven ground can pose challenges, but proper top link adjustment helps maintain constant depth. If you notice shallow and deep spots intermittently, engage the tractor’s draft control system (if equipped). Fine-tune the top link so the plow remains in draft control mode rather than wheel position mode, allowing the plow to float and adapt to terrain changes automatically.
Maintenance and Best Practices for Longevity
Routine upkeep of your plowing gear enhances performance and prevents costly downtime. After each field session, clean the plow frame, moldboards, and links to remove abrasive soil particles. Lubricate all pivot points, pins, and adjusters with high-quality grease. Periodically inspect welds on the plow frame and top link for hairline cracks. Tighten loose nuts and bolts to factory torque specifications to maintain proper alignment.
Store your plow in a dry, covered area to protect metal surfaces from rust. Consider applying a light coat of grease or anti-corrosion spray on exposed parts before long-term storage. Finally, review the operator’s manual for recommended service intervals for hydraulic cylinders and other critical components. Diligent maintenance ensures your equipment remains ready for the next plowing season, providing reliable performance and preserving soil health.