Mastering the art of switching between deep and shallow plowing can transform your field management strategy, boost crop yields, and extend the lifespan of your agricultural tools. Adequate adjustment of plow depth, informed by soil characteristics and seasonal requirements, is a **critical** skill for any farmer or contractor aiming to achieve **efficiency**, optimal **root** development, and effective **weed** control. This guide explores practical tips and proven techniques to help you navigate the complexities of adjusting plowing depth without compromising your soil’s health or your equipment’s performance.
Understanding Plowing Depths
Before making any adjustments, it’s essential to grasp the primary distinctions between shallow and deep plowing. Each method addresses different agronomic objectives and requires careful consideration of the soil’s physical and chemical properties.
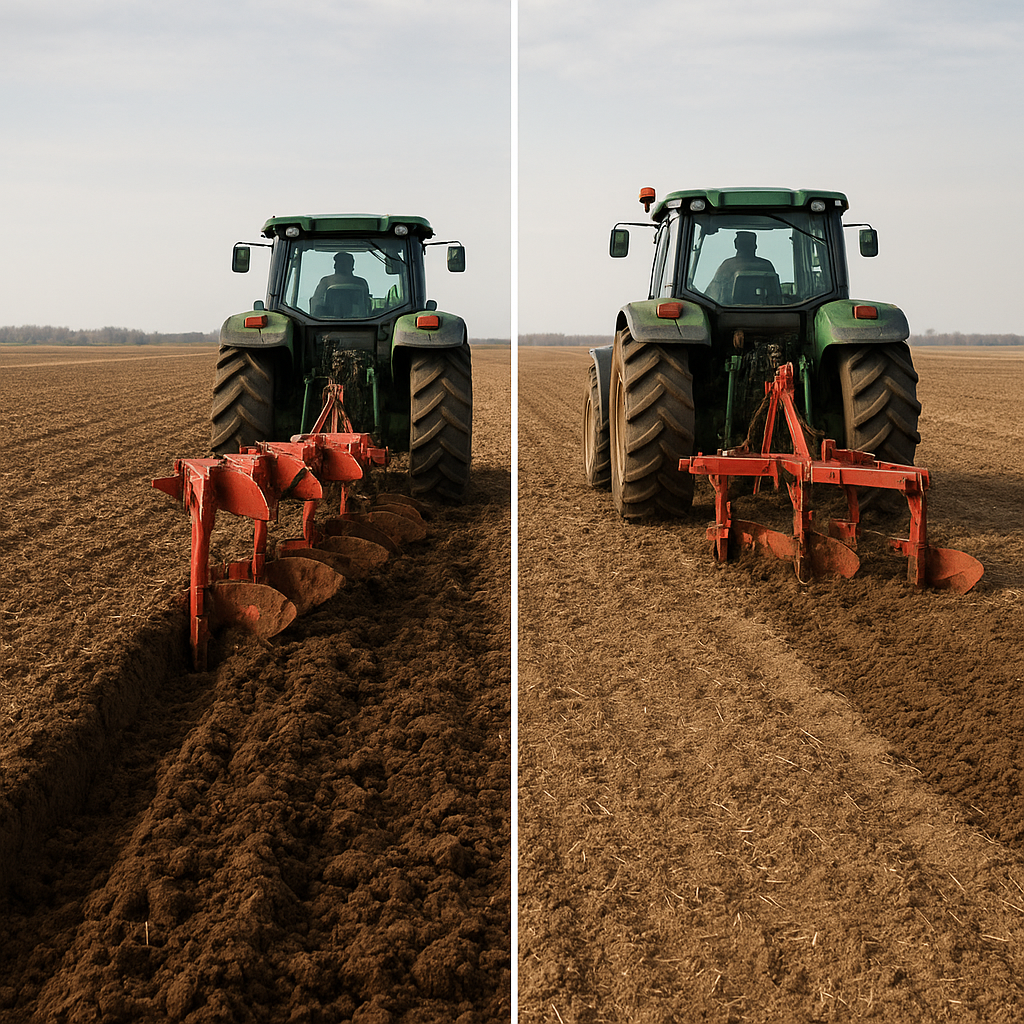
- Shallow plowing typically penetrates 5–10 centimeters and is ideal for surface residue incorporation and seedbed preparation.
- Deep plowing extends beyond 20 centimeters, breaking through compacted layers (hardpan) and promoting deep moisture infiltration.
Benefits of Shallow Plowing
Shallow plowing offers quick turnaround times and reduces fuel consumption, making it a cost-effective choice for frequent operations. Key advantages include:
- Enhanced soil aeration in the top layer without disturbing deeper horizons
- Efficient incorporation of crop residues to facilitate microbial activity
- Reduced risk of erosion on sloped fields
- Minimized wear on heavy-duty components of your equipment
Benefits of Deep Plowing
When compacted layers impede root growth or water movement, deep plowing becomes indispensable. Its benefits include:
- Breaking up subsoil compaction to encourage deeper roots
- Improved drainage and enhanced retention of precipitation during dry spells
- Greater access to subsoil nutrients and minerals
- Long-term improvements in field structure and reduced need for repeat tillage
Assessing Soil and Equipment
Successful depth transitions depend on a thorough assessment of both your soil profile and the capabilities of your plowing equipment. Conducting field tests and equipment inspections is a critical first step.
Soil Types and Conditions
Different soils react uniquely to plowing intensity. Loamy soils are generally forgiving, but heavy clays and silts may create unstable ridges when plowed too deep. Sandy soils, conversely, can lose moisture rapidly if overworked. Evaluate soil moisture with a simple squeeze test: a handful should form a loose ball without dripping water.
Equipment Selection and Calibration
Whether you’re using a moldboard plow, chisel plow, or subsoiler, precise calibration is crucial. Inspect the following:
- Plow frame integrity and fatigue cracks
- Point and share wear—replace components exceeding recommended wear limits
- Hydraulic system pressure gauges and cylinder seals for leaks
- Depth-control mechanisms such as gauge wheels or auto-reset features
Adjust your tractor’s ballast and tire pressure to achieve the right traction without causing compaction beyond the intended plow depth.
Switching Techniques and Best Practices
Transitioning smoothly from one depth to another requires a systematic approach. Gradual changes help maintain uniform furrows and prevent undue strain on your equipment.
Adjusting Plow Settings
Follow these steps for a controlled depth change:
- Park on level ground and shut off the engine before making any mechanical adjustments.
- Loosen the locking bolts on the depth-control levers or hydraulic cylinders.
- Set the gauge wheels to the new desired depth—remember that each centimeter deeper can increase draft requirements by up to 7%.
- Tighten all fasteners and engage the depth control in manual or automatic mode based on your tractor’s configuration.
- Conduct a short test run over a trial strip to confirm uniform depth across the implement’s width.
Maintaining Efficiency and Reducing Wear
Extended plowing sessions, especially at deep settings, accelerate wear on bearings and seals. To maximize longevity:
- Apply high-quality lubricants to pivot points before starting each day.
- Inspect blades at midday for signs of glazing or dulling, sharpening as needed.
- Implement a two-day rotation: follow deep plowing with a lighter pass to alleviate extreme compaction.
- Record depth settings and field conditions in a logbook to refine your approach over multiple seasons.
Environmental and Crop Management Considerations
Beyond mechanics, depth selection influences broader agronomic outcomes. Understanding these interactions can optimize both yield and sustainability.
Timing and Crop Rotation
Align your plowing schedule with crop rotation plans. For example, deep tillage before planting legumes can enhance nitrogen fixation by improving root penetration. Conversely, shallow sessions before cereals help preserve the microenvironment needed for grass and cereal seedlings.
Erosion Control and Nutrient Management
While deep plowing can rejuvenate worn-out fields, it may also increase susceptibility to erosion if undertaken on unprotected slopes. Strategies to mitigate this risk include:
- Establishing cover crops immediately after deep passes to stabilize the surface
- Applying compost or green manure to boost organic matter and improve aggregate stability
- Contouring furrows along slope lines to reduce runoff speed
By balancing plowing depth with preventative measures, you can preserve valuable topsoil and maintain adequate levels of moisture and fertility.