Testing the soil pH before plowing is an essential step in maximizing crop yields, preserving soil health, and ensuring efficient use of fertilizers. By understanding the acid-base balance of your field, you can make informed decisions about lime applications, nutrient management, and crop selection. This guide provides practical advice on gathering reliable data, interpreting results, and making adjustments prior to the plowing season. Follow these proven techniques to achieve better germination, root development, and long-term productivity.
Equipment and Materials Needed
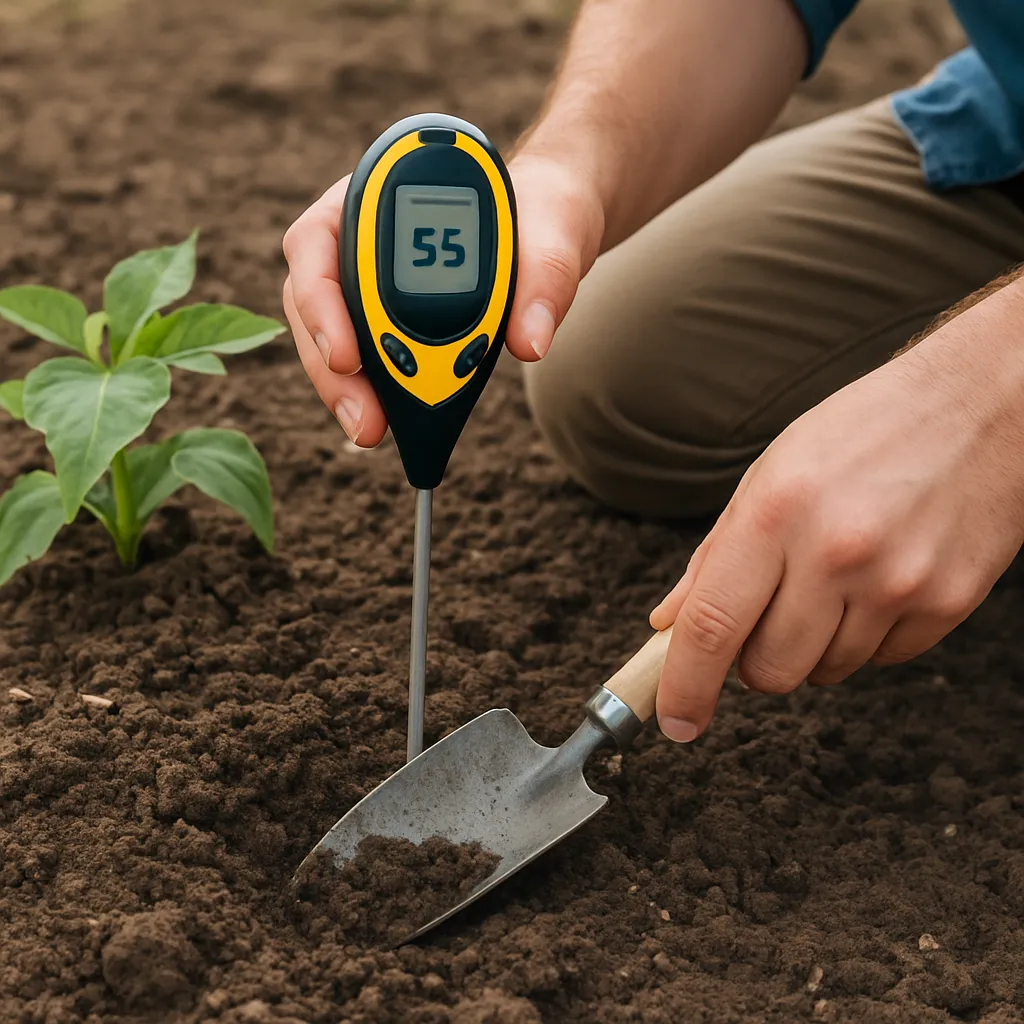
Before heading to the field, assemble all necessary gear to perform a precise test. Having everything on hand will streamline the process and reduce the risk of contamination or errors.
- Clean soil probe or garden trowel
- Plastic bucket or container
- Distilled water (for mixing and rinsing)
- Instrument for measuring pH (electronic meter or calibrated pH strips)
- Plastic spoons or spatulas
- Clean sampling bags or paper envelopes
- Permanent marker and field notebook
- Calibration solutions (for electronic meters, typically pH 4.0, 7.0, and 10.0)
Electronic Meter vs. pH Strips
- Electronic meters offer higher accuracy (±0.1 pH unit) but require regular calibration and careful maintenance.
- pH strips or test kits are more affordable and simpler to use but may only provide readings to the nearest 0.5 or 1 pH unit.
Preparing and Collecting Soil Samples
Proper sampling technique is crucial to obtain accurate and representative results. A single poorly collected sample can lead to misinterpretation and incorrect treatment.
Selecting Sampling Zones
Divide your field into management zones based on visible differences in topography, crop history, and fertility. Each zone should not exceed 10 acres to ensure uniformity. Within each zone:
- Collect 10–15 subsamples in a zigzag pattern to capture variability.
- Mark the perimeter of the zone with a GPS if available.
- Avoid areas near fence lines, pesticide storage, or compost piles to prevent skewed results.
Depth and Technique
Use a soil probe to take cores from the soil sample depth of 0–6 inches for plow-and-till systems. For no-till areas, you may also sample deeper layers (6–12 inches) to understand subsoil conditions.
- Remove surface litter or residue before sampling.
- Twist the probe or push the trowel vertically to the desired depth, ensuring a clean, uniform core.
- Deposit each subsample in the bucket, mixing thoroughly by hand (wear gloves to avoid contamination).
Preparing the Composite Sample
- After gathering all subsamples for the zone, mix them until the color and texture are consistent.
- Scoop approximately 1–2 cups of the blended soil into a labeled bag.
- Record the date, field ID, and zone number in your notebook.
- Allow the sample to air-dry in a shaded area, spreading it on clean paper to prevent mold growth.
Conducting the pH Test and Interpreting Results
Once your composite samples are ready, proceed with the actual test. Follow manufacturer instructions closely for best outcomes.
Using an Electronic pH Meter
- Rinse the probe with distilled water and blot dry.
- Calibrate the device using pH 7.0 and pH 4.0 solutions (or pH 10.0 if testing alkaline soils).
- Mix 1 part soil with 2 parts distilled water in a clean container and stir thoroughly.
- Allow the soil-water slurry to stand for 10–15 minutes, stirring occasionally to ensure even suspension.
- Insert the probe into the clear supernatant and wait for the reading to stabilize.
Using pH Strips or Test Kits
- Place a small amount of soil in the provided vial or test container.
- Add the specified number of drops of testing solution or use the color card method for strips.
- Shake or mix gently, then compare the resulting color to the standard chart within the recommended time frame (usually 1–2 minutes).
Understanding pH Values
- Values below 7.0 indicate acidity; the lower the number, the more acidic the soil.
- Values above 7.0 indicate alkaline conditions; certain nutrients become less available in highly alkaline soils.
- Most crops thrive at a pH between 6.0 and 7.0, where nutrient availability is optimal.
- Record each zone’s pH in your field notebook for mapping and future comparisons.
Adjusting Soil pH Before Plowing
After determining current conditions, plan your amendments. Proper adjustment ensures that plowed soil has a balanced environment for seeds and fertilizers.
Correcting Acidic Soils
- Apply agricultural lime (calcium carbonate) at rates determined by soil buffering capacity. A soil test report from a lab can specify exact rates.
- Dolomitic lime provides magnesium as well as calcium, beneficial for certain crops.
- Incorporate lime several weeks before plowing to allow time for reactions to occur in the root zone.
Correcting Alkaline Soils
- Use elemental sulfur or ammonium sulfate to lower pH; these amendments oxidize over time, producing sulfuric acid in the soil.
- Gypsum does not significantly change pH but can improve soil structure in sodic soils.
- Apply in multiple split applications to avoid excessive temporary acidity.
Monitoring and Follow-Up
Re-test your fields every 2–3 years, or annually if rapid changes are expected. Record all amendment rates and pH changes to refine your long-term management plan. Proper timing and uniform distribution before plowing ensure that the newly tilled soil offers an ideal environment for nutrient uptake and root proliferation.